Intro to PostgreSQL
PostgreSQL is an open-source object-relational database system. It uses
SQL language to perform operations. PostgreSQL is known for safely storing data that is also and scale-able in the most complicated data workloads.
PostgreSQL born in 1986 at the University of California at Berkeley.
PostgreSQL built-in got many amazing features aimed to help developers build applications, administrators to protect data integrity and build fault-
tolerant environments, and help you manage your data no matter how big or small the dataset.
Intro to GIS
GIS stands for “Geographic Information System”. It is a system designed to capture, store, manipulate, analyze, manages, and present spatial or geographic data. It allows users to create interactive queries, analyze spatial information, edit data in maps, and present the results of all these operations. Spatial data identifies the geographic location features and boundaries on earth.
Intro to Spatial Database
A spatial database includes location. It has geometry as points, lines
and polygons. It is a database that is optimized for storing and querying data that represents objects defined in a geometric space. It can also per-
form operation in complex structures such as 3D objects, and topological coverage.
Installation
We are working on a Windows based 64 bit OS. We will use Enterprise DB
installer, which also give options to install extensions during the installation
process.
Installer Download:
https://www.enterprisedb.com/downloads/postgres-postgresql-downloads
During installation, Open the Categories: Spatial Extensions, and check
the box for the PostGIS bundle. The initial database created with this
method will already have the PostGIS extension enabled.
Installation in Windows
We have installed MongoDB is a windows based system. It can also be
installed in Linux or iOS operating systems.
For the windows, we can follow the simple tutorial at
https://docs.mongodb.com/manual/tutorial/install-mongodb-on-windows/
1.2 Workflow: GIS Data in PostgreSQL
We will follow a step by step process to get the desired results. Screenshots
of the following steps also provided.
Step 1: Create a spatial database
a. Open pgAdmin 4 (password: 1234)
b. Open postgreSQL 12 (password: 1234)
c. Right-click on Database -> Create -> Database
d. Give a Database name (for example; spatialDB) and save it.
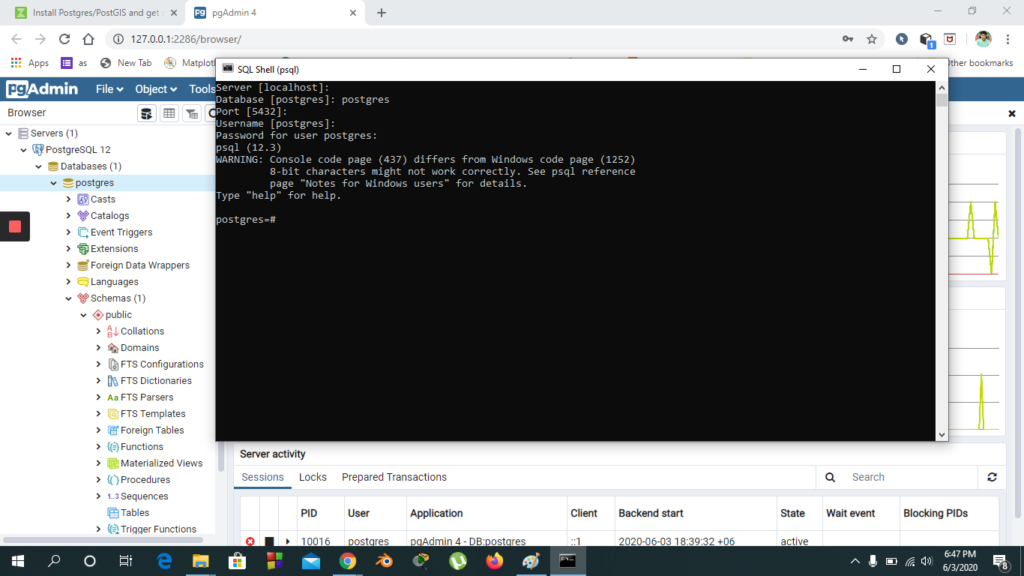
Step 2: Open SQL Shell (psql)
a. Server [localhost]: press enter
b. Database [postgres]: (DB Name, example – spatialDB)
c. Port [5432]: -> press enter
d. Username [postgres]: press enter
e. Password for user postgres: (Password for postgres, here – 1234)
f. spatialDB= create extension postgis;
g. spatialDB=
C:\Users\Preneur Lab\Desktop\PG\cb_2017_us_state_20m>shp2pgsql -I -s 4269
./cb_2017_us_state_20m.shp public.us_state_20 |
"C:\Program Files\PostgreSQL\12\bin\psql.exe"
-U postgres -d spatialDB -p 5432
Step 3: Open cmd ind ”cb 2017 us state 20m” folder directory
and run following command.
a.
C:\Users\Preneur Lab\Desktop\PG\cb_2017_us_state_20m>shp2pgsql -I -s 4269
./cb_2017_us_state_20m.shp public.us_state_20 |
"C:\Program Files\PostgreSQL\12\bin\psql.exe" -U postgres -d spatialDB -p 5432
b. Give password (1234)
Step 4: Open cmd ind ”uswtdbSHP” folder directory and run
following command.
a. Command:
C:\Users\Preneur Lab\Desktop\PG\uswtdbSHP>shp2pgsql -I -s 4269
./uswtdb_v3_0_1_20200514.shp public.us_wind_turbine |
"C:\Program Files\PostgreSQL\12\bin\psql.exe" -U postgres -d spatialDB -p 5432
b. Give Password (1234)
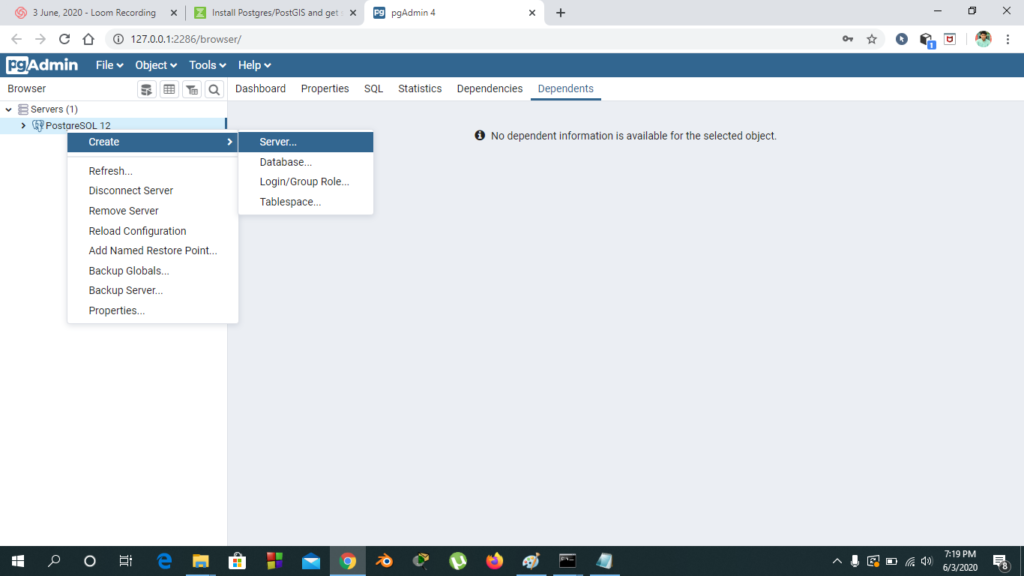
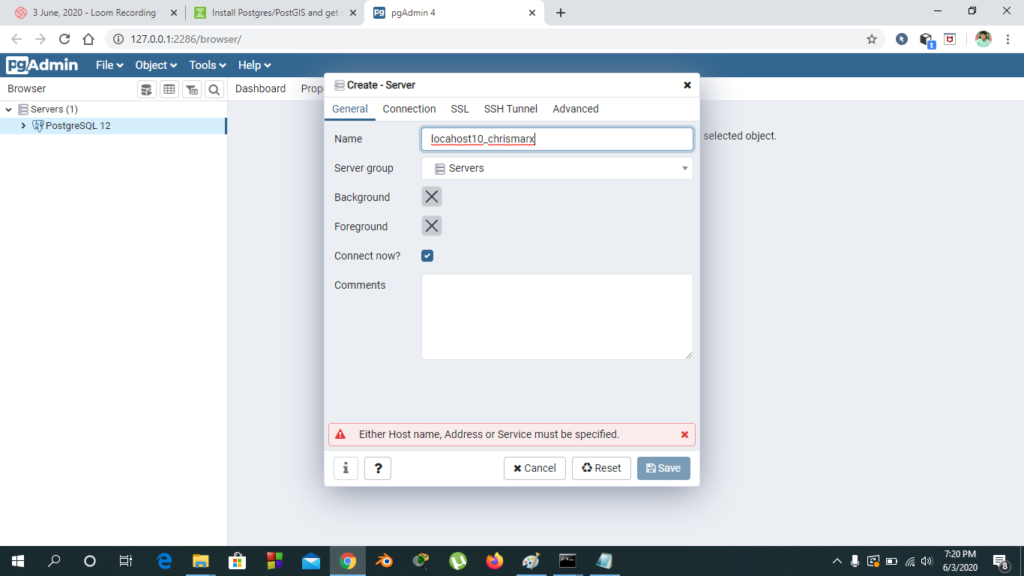
Step 5: Create New Server
a. Right click on Servers : Create : Server
b. Provide a Server Name
c. Connection : Host Name – Address : localhost Password (Set a
password, for example 1234)
d. Save it.
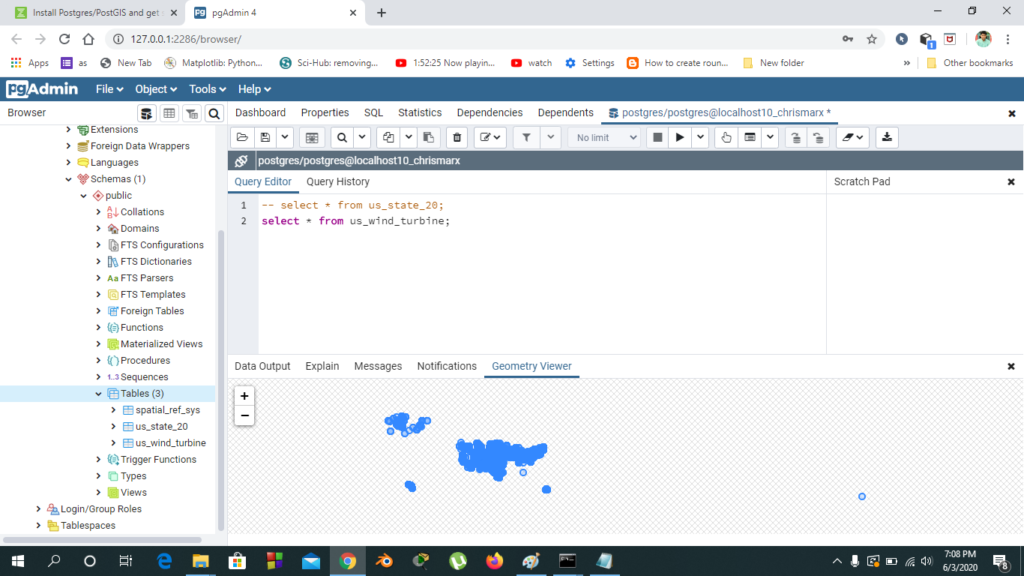
Step 6: Projection through SQL query
a. Access the Database created in step-1 through the server created in
step-5. b. Open query tool from top left (Tools -¿ Query Tool). c. Execute
following SQL Query. 1.
select * from us_state_20; (To see graphical view, in the “Data Output” pane,
horizontally scroll to last column named “geom”, and click the “eye” icon)
2.
select * from us_wind_turbine; (To see graphical view, in the “Data Output” pane,
horizontally scroll to last column named “geom”, and click the “eye” icon)
select geom from us_state_20
union all
select * from (
--NOTE the field might be named just "geom" if you added a shapefile rather than geojson
select geom from us_wind_turbine limit 200
)a;
select s.stusps, count(*) as turbine_cnt
from us_state_20 s
join
us_wind_turbine w
on st_contains(s.geom, w.geom)
group by stusps
order by turbine_cnt desc
select b.stusps, b.gid, coalesce(turbine_cnt,0), s.geom from (
select s.stusps, s.gid, count(*) as turbine_cnt
from us_state_20 s
join
us_wind_turbine w
on st_contains(s.geom, w.geom)
group by stusps, s.gid
order by turbine_cnt desc
)b
right join us_state_20 s on b.gid = s.gid